
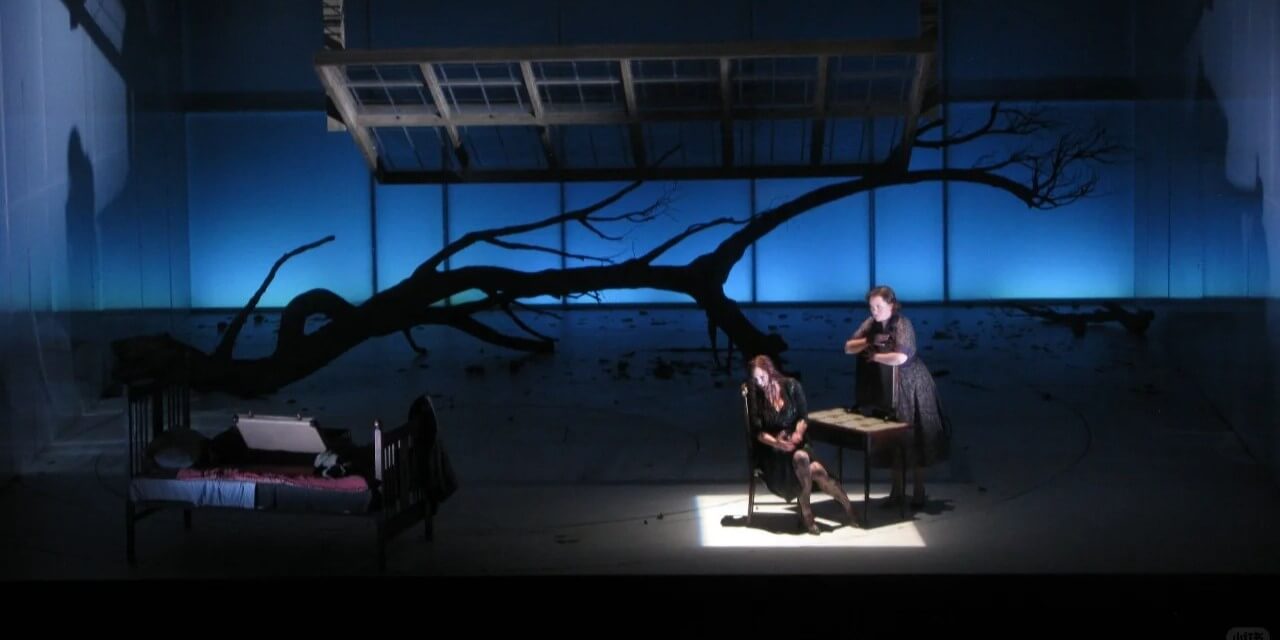
Introduction: From Lighting a Stage to Shaping It
Stage lighting has never been only about making a space visible. At its best, it shapes how a stage feels, how a story is perceived, and how the audience experiences depth, focus, and atmosphere.
That is why one of the most important questions in lighting design is not how to add more light, but how to create more visual value with the fixtures already in the rig.
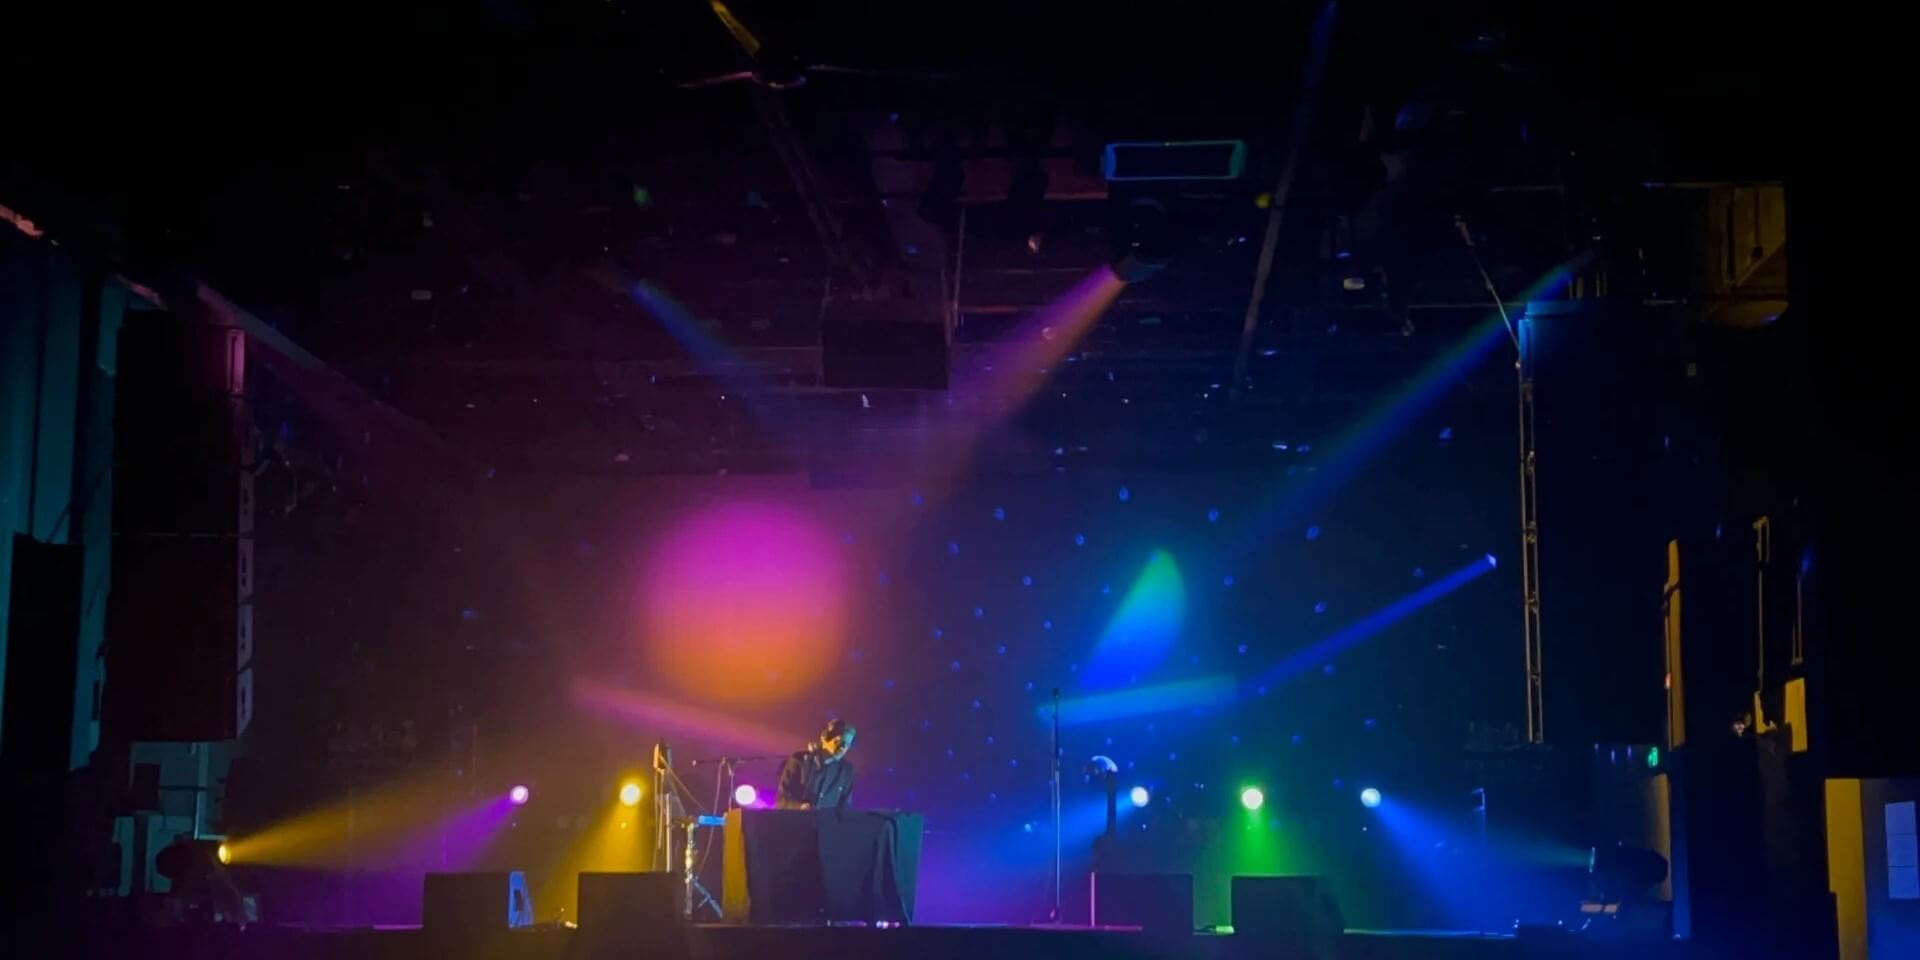
This is where gobos become so effective. More than simple projected patterns, gobos can break up flat backgrounds, add texture to empty surfaces, separate foreground from background, and guide attention without the need for extra fixtures or physical scenery.
In this guide, we will explore how lighting designers use gobos to create more stage depth without adding more fixtures. We will look at practical techniques for layering, focus control, projection size, and material selection, along with common mistakes and the real-world questions professionals ask when choosing and using gobos in live stage environments.
Whether you work in theatre, live events, worship production, rentals, or installed venue lighting, the goal is the same: to create a stronger sense of space with the tools you already have. In many cases, the difference between a flat stage and a dimensional one starts with a single well-used gobo.

Why Some Stages Still Look Flat Even When the Rig Is Bright
A bright stage is not necessarily a dimensional stage. In fact, adding more fixtures can sometimes make the problem worse.
When every surface receives even, uniform illumination, the human eye loses clear spatial cues. Everything begins to read as one plane of similar brightness. This is why many well-lit stages still feel flat, shallow, and visually uninteresting.
There are three common reasons this happens:
1. Only using wash lights without texture.
Wash fixtures are excellent for coverage, but they do not add variation across a surface. A cyc or backdrop lit only by wash often remains a single, smooth field, with very few depth cues for the eye to read.
2. Over-focusing on color instead of contrast.
Color creates mood, but contrast creates depth. A stage can look beautiful in color and still feel flat if there is too little distinction between bright and dark areas. Depth depends on highlights and shadows working together.
3. Placing all fixtures at similar angles.
When most of the light comes from the front or the same overhead direction, shadows become weak and surfaces lose shape. Depth usually needs sidelight, backlight, or grazing angles that reveal texture and create separation.
The good news is that fixing a flat stage rarely requires more fixtures. More often, it requires changing the quality of light already in the rig. And that is exactly where gobos come in.
Why Gobos Are So Effective for Creating Depth in Stage Lighting
Gobos are effective because they do something plain light cannot: they give empty surfaces visual structure.
A wash light can brighten a wall, floor, curtain, or backdrop, but it usually leaves that surface looking smooth and uniform. A gobo changes that by adding pattern, breakup, and texture. Once that happens, the eye no longer reads the stage as one flat area. It starts to read it in layers.
There are three main reasons this matters:
1. Gobos add texture to surfaces that would otherwise look empty.
A blank backdrop lit with wash may look clean, but it often feels flat. Add a leaf breakup, window pattern, or textured gobo, and the same surface gains character, depth, and atmosphere. This is why gobos are often used to create not just imagery, but also texture and spatial interest.
2. Gobos create separation between different parts of the stage.
Depth depends on the eye being able to tell what should stand forward and what should fall back. Gobos help by breaking visual uniformity. A background can feel softer and more atmospheric, while another area feels more defined. That usually does more for depth than simply adding more fixtures.
3. Gobos add more visual value than plain light.
A plain wash mainly adds brightness. A gobo can add texture, focus, rhythm, and contrast at the same time. That is why many designers use gobos to get more from the fixtures they already have. In some cases, one fixture with a well-used gobo can contribute more to depth than several plain lights.
This is what makes gobos so useful for stage depth. They do not rely on extra scenery or more hardware. They make the existing stage picture feel richer, more layered, and more intentional.
5 Practical Ways to Use Gobos to Create More Stage Depth
1. Add Texture to Empty Backgrounds and Surfaces
Start with the biggest blank surface on the stage.
If a backdrop, wall, curtain, or floor is reading as one smooth field of light, add a textured gobo to break it up. This is often the fastest way to create visible depth without changing the rig.
To make it work well:
-
Choose simple patterns first.
Leaf breakups, window patterns, and soft abstract textures usually work better than highly detailed gobos. They create depth without making the background feel busy. -
Use softer focus for background texture.
If the pattern is too sharp, it can feel graphic and distracting. A slightly softened gobo usually looks more natural on large scenic surfaces. -
Keep the texture secondary to the subject.
The background should support the stage picture, not compete with it. If the gobo becomes the brightest or most detailed element in view, it will pull attention away from the action. -
Use texture where the stage feels empty, not everywhere.
You do not need to cover every surface. One well-placed textured area is often enough to stop the background from feeling flat.
A textured gobo works best when it makes the background feel intentional, not decorated.
2. Use Gobos to Separate the Subject from the Background
Depth becomes clearer when the audience can immediately tell what should stand forward and what should fall back.
One of the easiest ways to do that is to let the background carry pattern while keeping the main performance area cleaner. This creates visual separation without needing more fixtures.
To apply this well:
-
Keep the subject area cleaner than the background.
If the performer, speaker, or focal object is standing in the most complex part of the projection, the image can feel cluttered. Let the background carry more texture, and keep the main subject easier to read. -
Avoid matching the foreground and background too closely.
If both layers have the same brightness, same density, and same visual weight, the stage still feels flat. One layer should clearly support the other. -
Use pattern placement to push the background back.
A patterned upstage wall or backdrop often helps the eye read that area as its own layer, which makes the subject feel more forward even without adding extra front light. -
Protect faces and key action zones.
Do not let a busy gobo cross the most important visual area unless that is a deliberate creative choice. Depth should improve clarity, not reduce it.
The goal is simple: the audience should never have to work to find the focal point.
3. Combine One Sharp Gobo with One Soft Gobo
This is one of the most useful ways to build depth with only a small number of fixtures.
Instead of making every gobo equally crisp, give each layer a different visual role. Let one feel more defined, and let the other feel more atmospheric.
A practical way to do this is:
-
Use the softer gobo for the background layer.
A slightly defocused textured gobo works well for atmosphere. It fills space without drawing too much attention to itself. -
Use the sharper gobo where you want more structure.
A clearer pattern can define a foreground area, frame a scene, or add stronger visual identity. -
Do not make both layers equally sharp.
If everything is crisp, the stage can start to feel busy and graphic instead of deep. The eye needs variation to read layers. -
Let focus help control importance.
Sharper usually feels more immediate. Softer usually feels more recessed. That difference is often enough to create a stronger sense of spatial depth.
This technique works well because it creates contrast without needing more color, more brightness, or more hardware.
4. Layer Simple Gobo Patterns Instead of Overcomplicating the Scene
When people first start using gobos for depth, a common mistake is choosing patterns that are too detailed or stacking too many effects at once.
Depth usually comes from clear visual relationships, not from complexity.
A better approach is to layer simple gobos with different jobs:
-
Use one pattern for atmosphere.
This could be a soft breakup, light foliage texture, or abstract surface pattern. -
Use another pattern for structure.
This could be a window frame, cleaner breakup, or stronger directional shape. -
Keep the visual language consistent.
If one pattern feels architectural and another feels organic, the combination can look random unless the scene is designed that way. -
Leave negative space.
Not every part of the stage needs pattern. Empty areas help the textured areas feel intentional and keep the image readable.
A good layered look usually feels controlled, not crowded. If the audience notices “too many effects” before they notice depth, the layering has gone too far.
5. Add Gentle Motion to Create Living Depth
Static gobos can create depth, but gentle movement can make that depth feel more alive.
This does not mean fast rotation or obvious effect-heavy motion. In most cases, subtle movement works better because it adds dimension without distracting from the scene.
To use motion well:
-
Keep the movement slow.
A slow rotation or slight motion shift usually feels atmospheric. Fast movement can turn a depth layer into a special effect. -
Let the background move more than the foreground.
This helps the stage feel active without disturbing the main focal area. -
Use different motion speeds carefully.
If two gobos move at slightly different speeds, the stage can feel more layered. But if the speed difference is too strong, the effect can feel messy instead of deep. -
Make sure motion supports the scene.
A theatrical moment, worship environment, or corporate stage usually needs more restraint than a club or concert setup.
Used carefully, motion adds life to the stage picture. Used too aggressively, it weakens focus. The key is to make the space feel deeper, not busier.
How to Layer Gobos Without Making the Stage Look Busy
Layering gobos is one of the most effective ways to build depth, but it only works when each layer has a clear job.
If every gobo is equally bright, equally sharp, and equally complex, the result usually feels crowded instead of dimensional. The eye stops reading depth and starts reading noise. Good layering is not about adding more patterns. It is about creating a clear relationship between them.
A practical way to keep the scene controlled is to think in layers:
1. Give each gobo a different role.
One layer should usually provide atmosphere, while another provides structure. For example, a soft textured breakup can fill the background, while a sharper window or directional pattern adds definition closer to the subject. If both layers try to do the same job, the stage picture quickly becomes muddy.
2. Do not let every layer demand equal attention.
The audience should feel a visual order. One layer should sit back, one layer can feel more present, and the main subject should still remain the easiest thing to read. If all layers have the same brightness and visual weight, the stage will feel busy rather than deep.
3. Keep the patterns simple enough to work together.
Layering usually works best when at least one of the gobos is visually simple. Two highly detailed patterns often fight each other. A softer breakup paired with a cleaner, more structured shape is usually easier to control.
4. Use focus to separate layers.
This is one of the most useful tools in layered gobo work. A softer layer can sit back and create atmosphere, while a sharper layer adds clearer visual definition. If both layers are equally crisp, the image can feel graphic and crowded instead of spacious.
5. Leave part of the stage untextured.
Not every surface needs pattern. Negative space is part of what makes layering work. When everything is filled, the eye has no place to rest, and the effect loses depth.
6. Check the image from the audience view, not just from the rig.
Layered gobos can look balanced on paper but feel very different from the house. What matters is whether the audience reads the scene as clear and dimensional, not whether every effect is visible from the programming position.
A good layered look should feel natural and intentional. The audience does not need to notice that multiple gobos are working together. They just need to feel that the stage has more space, more atmosphere, and more depth.
When to Keep a Gobo Sharp and When to Defocus It
Focus control has a huge effect on how a gobo feels on stage.
Many people assume that a sharper gobo is always better. In practice, that is not true. Sharp focus and soft focus do different jobs, and choosing the wrong one can make a stage look either flat or distracting.
A simple way to think about it is this:
-
Keep a gobo sharp when you want the pattern itself to be recognized.
If the gobo is meant to read as a window frame, architectural shape, logo, or other defined image, the edges need to stay clear. A soft version of that same pattern often looks weak or accidental. -
Defocus a gobo when you want texture more than illustration.
For foliage, abstract breakup, cloud-like texture, or atmospheric background layers, a slightly softer focus usually works better. It makes the effect feel more natural and less like a graphic stamped onto the stage.
There are four practical guidelines that help:
1. Use sharp focus for structure.
A crisp gobo gives the eye something solid to identify. It works well when the pattern is supposed to feel intentional, strong, or part of the visual architecture of the scene.
2. Use softer focus for atmosphere.
A defocused breakup usually blends better into curtains, walls, floors, and scenic surfaces. It supports the space without pulling too much attention to itself.
3. Do not make every gobo equally sharp.
If all projected patterns are crisp, the scene can start to feel crowded and overly graphic. Varying focus helps create depth and keeps the image easier to read.
4. Check focus from the audience position.
A gobo that looks slightly soft from the console may look just right from the house. Final focus decisions should be made from the view that matters most.
In most real stage environments, the best choice is not maximum sharpness. It is the level of focus that best supports the role of that gobo in the scene.
How Projection Size, Beam Angle, and Throw Distance Affect Gobo Depth
A gobo can look excellent in one position and completely wrong in another. In many cases, the problem is not the pattern itself — it is the projection size.
Three factors control how large a gobo appears on stage:
1. Throw distance
The farther the fixture is from the surface, the larger the projection becomes.
2. Beam angle
A wider beam creates a larger projection. A narrower beam keeps the pattern tighter.
3. Focus
A sharper focus keeps the edges more defined. A softer focus spreads the image and changes how large and dense it feels.
A useful starting formula is:
Projection Diameter = 2 × Distance × tan(Beam Angle / 2)
You do not need to calculate this for every setup, but the principle matters:
more distance + wider beam = larger gobo projection.
Here is how that affects stage depth in practice:
1. A projection that is too large can flatten the scene.
If the pattern spreads too far, it can cover multiple areas with the same visual treatment. Instead of creating layers, it makes the whole stage feel visually uniform again.
2. A projection that is too small may not read from the audience.
A tight gobo can look great from close range but disappear once viewed from the house, especially on large stages.
3. Background gobos usually need more coverage, but less detail.
If a gobo is being used to texture a wall, curtain, or backdrop, it often works better when it covers a broader area with a simpler pattern.
4. Foreground gobos usually need more control.
If the goal is to frame a subject or define a specific zone, a tighter and more deliberate projection is usually more effective than flooding a large area.
To make this easier in real setups:
1. Decide the job of the gobo before adjusting the fixture.
Are you texturing a whole backdrop, defining a corner, framing a performer, or adding a layer to the floor? The answer determines how large the projection should be.
2. Match the beam angle to the surface size.
Do not use a wide spread just because it fills the area. If the pattern loses shape or becomes too diluted, it stops helping.
3. Check the image at audience distance.
A gobo that looks balanced on stage may feel too small, too busy, or too soft from the seating area.
4. Remember that size affects depth.
A broad, soft texture often works better for background atmosphere. A tighter, more controlled projection usually works better for structure and emphasis.
The main goal is not simply to make the gobo visible. It is to make it feel intentional within the stage picture. When projection size matches the role of the pattern, the stage reads as deeper, cleaner, and more controlled.
How to Choose the Right Gobo for the Effect You Want
Not every gobo solves the same problem.
Some are better for clean, bold shapes. Others are better for fine detail, soft atmosphere, or more complex imagery. If the material does not match the job, the effect can feel weak, messy, or unnecessarily expensive.
The easiest way to choose well is to start with the effect you want to create.
Steel vs. Glass Gobos: What’s the Difference?
Steel gobos are usually the better choice when you want simple shapes, strong breakups, and reliable everyday use.
They work well for:
- leaf and branch breakups
- window shapes
- clean silhouettes
- bold graphic patterns
- budget-conscious setups
Their biggest advantages are durability, lower cost, and strong contrast. If the pattern does not need fine internal detail, steel is often the most practical option.
Glass gobos are better when you need more detail, more complexity, or more refined imagery.
They work well for:
- detailed textures
- complex architectural patterns
- logos and custom artwork
- multi-tone or colored imagery
- more polished scenic effects
Their main advantage is precision. If the effect depends on small details or a more sophisticated image, glass usually gives you more control than steel.
A simple way to decide is this:
- Choose steel when you want bold structure.
- Choose glass when you want detail.
For many stage-depth applications, steel is enough — especially for breakup patterns and background texture. Glass becomes more valuable when the image itself needs to carry more visual information.
Can LED Fixtures Use Plastic Gobos?
Sometimes, yes — but with limits.
Because LED fixtures generally run cooler than traditional lamps, plastic gobos can be usable in some LED applications. They are cheaper, lighter, and useful for short-term or low-demand situations.
But they are not the best all-purpose solution.
Plastic gobos usually:
- wear out faster
- handle heat less well than steel or glass
- offer lower durability for repeated professional use
That means they may be acceptable for testing, temporary effects, or lighter-duty LED setups, but they are usually not the best choice for long-term stage work.
A practical rule is:
Use plastic only when the fixture supports it and the application is light-duty.
For regular professional use, steel and glass are usually the safer investment.
To choose the right gobo material, ask three questions first:
1. Does the pattern need fine detail or just a strong shape?
If it only needs shape, steel is often enough. If it needs detail, look at glass.
2. Is this for repeated professional use or occasional use?
If it will be used often, durability matters more.
3. Is the gobo creating atmosphere, structure, or a recognizable image?
Atmosphere and breakup often work well with steel. Recognizable imagery usually benefits more from glass.
Choosing the right gobo is not about buying the most advanced option. It is about matching the material to the role it needs to play in the stage picture.
FAQ About Using Gobos for Stage Depth
1. What Size Gobo Does My Fixture Use?
The correct gobo size depends on the fixture, not on the pattern design itself. There is no single “universal” size that fits every light. In practice, many fixtures use standard lettered sizes such as A or B, while some moving heads and projectors use their own custom dimensions. That is why size compatibility is one of the most common questions people ask before ordering a gobo.
The safest approach is simple:
- check the fixture manual first
- confirm outer diameter, image diameter, and maximum thickness
- do not assume two brands use the same size just because the fixtures look similar
Getting the size wrong usually means poor fit, poor focus, or the gobo simply cannot be installed correctly.
2. How Long Do Gobos Usually Last?
That depends on the material, the fixture, and how often the gobo is used.
In general:
- steel lasts longer and handles repeated professional use better
- glass can also last well when handled properly, but coated surfaces need more care
- plastic is cheaper but typically has a shorter usable life than steel or glass
If the application is frequent or professional, steel and glass are usually the safer long-term choices.
3. Can LED Fixtures Use Plastic Gobos?
Sometimes, yes — but only if the fixture supports them.
Because LED fixtures often run cooler than traditional lamp-based units, plastic gobos may be acceptable in some LED applications. But they are still less durable than steel or glass, so they are generally better for lighter-duty or shorter-term use rather than regular professional deployment.
The safe rule is:
- only use plastic if the fixture manufacturer allows it
- avoid treating plastic as the default choice for regular stage work
4. What Happens If a Gobo Is Installed the Wrong Way?
At best, the projection may look softer, less accurate, or more reflective than expected. At worst, incorrect orientation can increase heat stress and risk damage, especially with coated glass gobos. Martin documentation repeatedly advises installing coated gobos with the more reflective or coated side toward the lamp, and textured glass gobos have their own orientation requirements depending on the fixture family.
So the practical rule is:
- always check the fixture manual
- confirm which side faces the lamp and which faces the lens/stage
- do not assume all glass gobos orient the same way across all fixtures
5. Why Does My Gobo Projection Look Blurry or Have a Halo?
The most common causes are:
- incorrect focus
- projection size that is too large for the distance
- a pattern that is too detailed for the throw
- wrong gobo orientation or unwanted internal reflections
- checking the look only from the fixture position instead of the audience view
In many cases, a halo or reduced clarity can come from incorrect placement inside the fixture. Martin manuals repeatedly note that coated gobos should be installed with the more reflective or coated side toward the lamp, and incorrect orientation can increase overheating risk and degrade projection quality.
Final Thoughts: Better Depth Comes from Better Light Shaping
If you are looking to build a stage that feels deeper, cleaner, and more intentional, choosing the right fixture and the right gobo setup makes all the difference. Explore more stage lighting solutions and product options at https://betopperdj.com/ to find the right tools for your next setup.


Lascia un commento
Nota che i commenti devono essere approvati prima di essere pubblicati.
Questo sito è protetto da hCaptcha e applica le Norme sulla privacy e i Termini di servizio di hCaptcha.