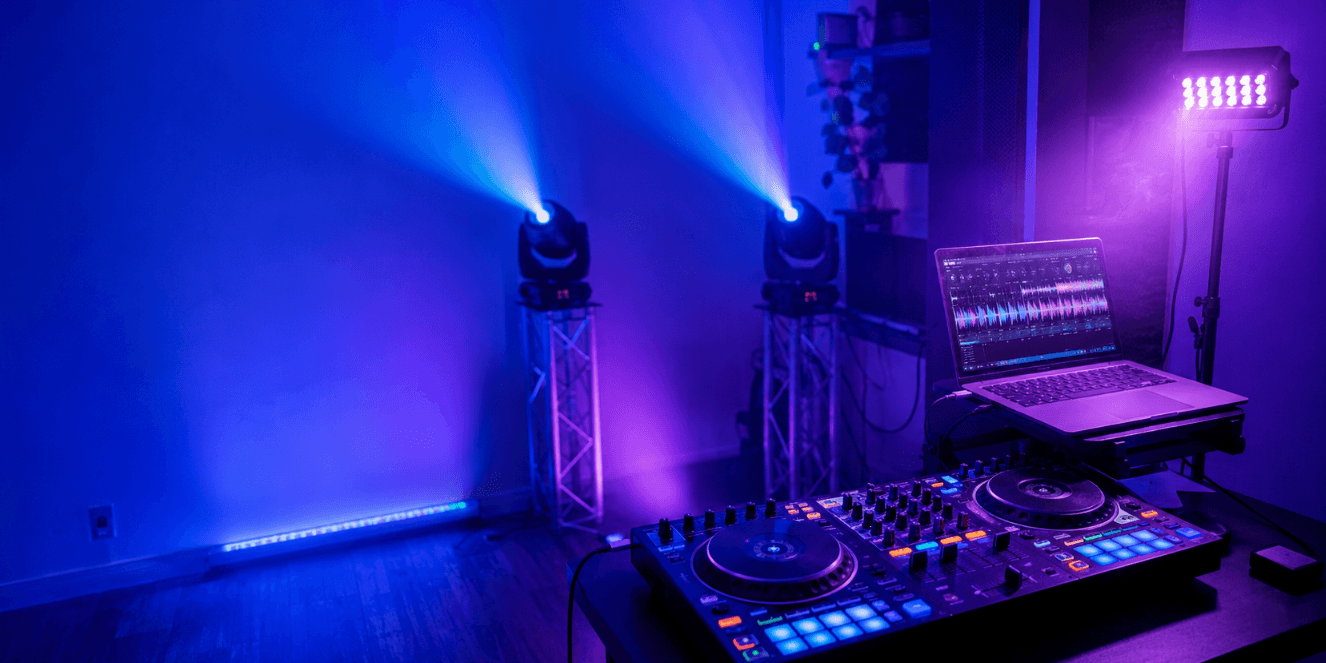
Introduction
A clean DJ lighting look starts with the structure of the song.
For DIY DJs, the goal is not to chase every beat or trigger every effect at once. A stronger approach is to give each part of the track a clear visual role: a calm base look for the intro, a stable mood for the verse, gradual movement during the build-up, a short impact moment for the drop, and a clean reset before the next section.
This method works especially well for home DJs, DIY lighting users, and anyone learning to control a small lighting setup manually. You do not need timecode or advanced programming to make a song feel more organized. You need a simple cue plan that follows the music.
This guide shows you how to program one song step by step using practical brightness ranges, color choices, movement ideas, and effect timing. The settings below are starting points, not fixed rules. Adjust them based on your room size, fixture output, wall color, camera exposure, and the mood of the track.

1. Choose One Track and Mark the Song Sections
Most DJ-friendly tracks can be simplified into a few sections:
- Intro
- Verse or groove section
- Build-up
- Drop or chorus
- Breakdown
- Outro or transition section
Example cue map:
| Song Section | Example Time | What Happens Musically |
|---|---|---|
| Intro | 0:00–0:16 | Track begins, energy is low |
| Verse / Groove | 0:16–0:48 | Rhythm settles, mood is stable |
| Build-Up | 0:48–1:04 | Energy rises gradually |
| Drop / Chorus | 1:04–1:36 | Peak energy arrives |
| Breakdown | 1:36–1:52 | Energy pulls back |
| Outro | 1:52–2:08 | Track prepares for transition |
2. Build One Base Look
After marking the song sections, create one simple lighting look.
This is your base look.
The base look is the lighting state you can safely use when the song needs stability. It should work for the intro, verse, breakdown, and outro.
Do not make this look too active. It should not use fast movement, strobe, or rapid color changes.
Start with:
| Setting | Starting Point |
|---|---|
| Brightness | 25–40% |
| Color | One soft color |
| Movement | Off or very slow |
| Strobe | Off |
| Fast effects | Off |
A simple base look could be:
- Soft blue wash at 35% brightness
- Moving heads pointed toward the back wall or ceiling
- No strobe
- No fast color change
- No spinning movement
Save this as Cue 1: Base.
This cue is important because every stronger lighting moment will be compared against it. If the base look is already too bright, too fast, or too colorful, the build-up and drop will have less impact.
A clean base look gives the rest of the song room to grow.
3. Turn the Base Look Into Five Simple Cues
Now that you have a base look, do not start from zero again.
Use the base look as the foundation and create four more cues by changing only one or two things at a time.
| Cue | Purpose | When to Use It |
|---|---|---|
| Cue 1: Base | Stable lighting | Intro / Verse |
| Cue 2: Lift | Slight energy increase | Early build-up |
| Cue 3: Tension | Stronger build-up | Final bars before drop |
| Cue 4: Impact | Short peak moment | Drop / Chorus |
| Cue 5: Reset | Lower energy | Breakdown / Outro |
This is the key idea: you are not making random effects. You are building five related lighting states.
Each cue should feel connected to the one before it. The lighting should grow step by step instead of jumping suddenly from calm to chaos.
4. Match the Five Cues to the Song Sections
Once your cues are ready, place them into the song structure.
Intro and Verse: Use the Base Cue
The intro and verse should establish the mood. Keep the lighting stable and readable.
Recommended approach:
| Setting | Approach |
|---|---|
| Brightness | 25–45% |
| Color | One main color |
| Movement | Static or very slow |
| Effects | Off |
| Strobe | Off |
Practical examples:
- For a deep house track, use soft blue or purple with no movement.
- For a funk or disco track, use warm amber or soft magenta.
- For a darker EDM track, use low-intensity blue with slow movement only.
- For a vocal section, keep the lighting steady so the music remains the focus.
If the verse already has fast movement, strong flashes, and constant color changes, there is no room for the song to grow later.
Build-Up: Move From Lift to Tension
The build-up is where lighting should start to grow.
Do not jump straight to full brightness or fast movement. Increase energy in stages.
A simple build-up plan:
| Build-Up Stage | Cue | Lighting Change |
|---|---|---|
| Start of build-up | Lift | Slightly brighter, small color shift |
| Middle of build-up | Lift / Tension | Add slow movement |
| Final bars | Tension | Stronger color, tighter movement, higher brightness |
Example settings:
| Setting | Early Build-Up | Final Build-Up |
|---|---|---|
| Brightness | 40–55% | 60–80% |
| Color | Similar to base | Stronger or higher contrast |
| Movement | Slow | Medium |
| Strobe | Off | Off or very brief pre-hit |
| Effects | Minimal | One controlled effect |
If your setup includes a wash moving head such as the Betopper LM0740, this is where it fits naturally. Use slow wash movement, gentle zoom changes, or gradual color shifts to build tension. The movement should grow with the music instead of starting at full speed.
A practical build-up cue could work like this:
- Keep the base color during the first part.
- Increase brightness slightly.
- Add slow pan or tilt movement.
- Add a small zoom change near the final bars.
- Save the strongest effect for the drop.
The build-up should feel like it is leading somewhere.
Drop or Chorus: Use One Strong Impact
The drop is the peak moment, but peak energy does not mean every effect should run at once.
Choose one strong accent and use it briefly.
Possible drop accents:
- Short brightness hit
- Fast movement burst
- Color snap
- White flash for 1–2 beats
- Quick blackout before the drop
- Short strobe accent
- Beam or position hit
Recommended approach:
| Setting | Drop / Chorus |
|---|---|
| Brightness | 80–100% briefly |
| Color | Bold single color or high-contrast pair |
| Movement | Short burst or controlled sweep |
| Strobe | Brief, not continuous |
| Duration | 1–4 beats for the strongest effect |
If you use an effect fixture such as the Betopper LF350, keep it for short impact moments: the first beat of the drop, a final chorus hit, or a transition accent. Avoid leaving high-impact effects active for the entire section unless the track truly needs that intensity.
A useful rule:
Use the strongest effect to mark the moment, then return to a controlled look.
This keeps the drop powerful without making the whole section visually crowded.
Breakdown and Outro: Use the Reset Cue
After a drop or chorus, the lighting should pull back.
This contrast is important. If the lights stay at peak intensity all the time, the next build-up will feel weaker.
For breakdown and outro sections, try:
| Setting | Approach |
|---|---|
| Brightness | 20–35% |
| Color | Soft, darker, or less saturated |
| Movement | Off or very slow |
| Effects | Off |
| Strobe | Off |
Good reset looks include:
- Deep blue with no movement
- Soft amber at low brightness
- Purple wash with no strobe
- Static look with one slow fade
- A dimmed version of the base cue
The outro should also help you move into the next track. Return to a clean cue that feels stable and flexible.
5. Use a Simple Manual DMX Workflow
You do not need a complex console to use this method. A basic DMX controller or software setup can work if your cues are organized.
Start with the controls you actually need:
- Dimmer
- Color
- Pan / tilt
- Movement speed
- Zoom, if available
- Strobe or effect control
- Blackout or shutter
Then label the important controls. Do not rely on memory.
Example:
| Control | Function |
|---|---|
| Fader 1 | Dimmer |
| Fader 2–4 | RGB color |
| Fader 5 | Pan |
| Fader 6 | Tilt |
| Fader 7 | Movement speed |
| Fader 8 | Strobe |
If your controller can save scenes, save the five cues. If it cannot, write down the values.
Example cue sheet:
| Cue | Brightness | Color | Movement | Effect |
|---|---|---|---|---|
| Base | 35% | Blue | Off | None |
| Lift | 50% | Blue to purple | Slow | None |
| Tension | 70% | Purple | Medium | Zoom / movement |
| Impact | 90% | White or red | Short burst | Brief strobe |
| Reset | 25% | Blue | Off | None |
This makes your lighting repeatable. You can come back to the same song and rebuild the look quickly.
6. Practice the Cue Changes With the Song
After creating the cues, play the full track and practice switching at the section changes.
Do not try to adjust everything at once. Practice one transition at a time:
| Transition | What to Practice |
|---|---|
| Base to Lift | Start the build-up smoothly |
| Lift to Tension | Increase energy without jumping too fast |
| Tension to Impact | Hit the drop clearly |
| Impact to Reset | Pull the lighting back after the peak |
| Reset to Base | Prepare for the next section or next track |
Run the song two or three times. Watch whether the lighting supports the music or feels too busy.
If the look feels messy, reduce something. Lower the brightness, slow the movement, remove one color change, or shorten the strobe.
Clean lighting usually comes from fewer changes used at the right time.
7. Common Mistakes DIY DJs Should Avoid
Avoid these common mistakes when programming one song:
| Mistake | Better Approach |
|---|---|
| Changing colors on every beat | Use color changes at section changes |
| Running movement through the whole song | Save movement for build-ups and drops |
| Using strobe too long | Use short accents only |
| Starting too bright | Leave room for the build-up |
| Using all effects at once | Choose one main effect per section |
| Skipping the reset | Pull back during breakdowns and outros |
| Not saving cue values | Write down or save every useful cue |
The goal is not to make the lighting busier. The goal is to make each change easier to understand.
Frequently Asked Questions
Do I need to sync lighting to every beat?
No. For DIY DJ control, it is often cleaner to follow song sections instead of every beat. Use stable looks for verses, gradual changes for build-ups, and short accents for drops.
How many lighting cues do I need for one song?
Five cues are enough for most songs: Base, Lift, Tension, Impact, and Reset. You can add more later, but these five give you a complete structure to start with.
Can I use this method with a basic DMX controller?
Yes. This method is designed for manual control and simple DMX setups. As long as you can control dimmer, color, movement, and basic effects, you can create a structured one-song look.
Should I use sound-active mode?
Sound-active mode can be useful for casual practice, but manual cues usually give you more control. If you use sound-active mode, use it for specific sections instead of letting it run through the entire track.
What is the most important cue?
Start with the base cue. A clean base look makes the intro, verse, breakdown, and outro easier to control. It also gives the build-up and drop more contrast.
Final Advice
If you are building your own DJ lighting setup and want fixtures that can support clean base looks, controlled movement, and short impact moments, explore Betopper’s DJ lighting solutions to find the right setup for your space and music style.
Explore Betopper DJ lighting solutions:
https://betopperdj.com/pages/lighting-solution

コメントを残してください
全てのコメントは、掲載前にモデレートされます
このサイトはhCaptchaによって保護されており、hCaptchaプライバシーポリシーおよび利用規約が適用されます。