
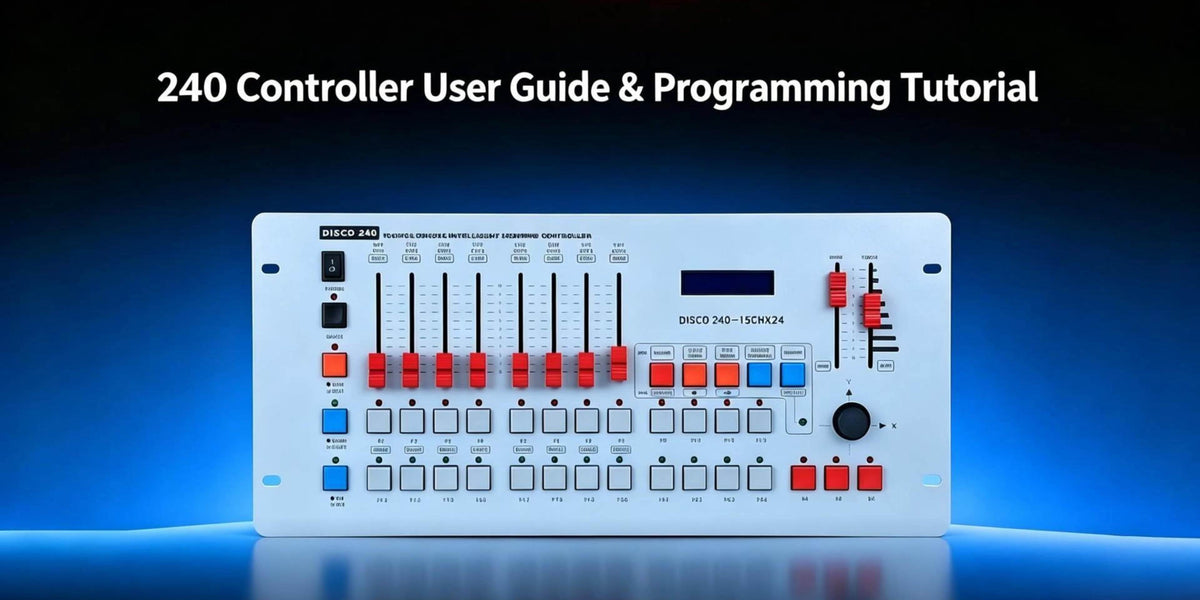
This tutorial is part of the Betopper DMX 240 Controller Tutorial Series, where we walk through practical ways to set up and program stage lighting with the DMX 240 controller.
In the previous tutorials, we've been building up the basics of working with moving-head fixtures and creating lighting effects. This time, we're focusing on a different part of the controller: the X/Y joystick.
By the end of this tutorial, you'll know:
- How to set up the X/Y joystick on the DMX 240 controller
- What P1 and P3 control on the X/Y joystick
- How to use the joystick to control Pan and Tilt
- How to test the fixture after completing the setup
- How to use joystick control when positioning moving-head fixtures
Before You Start: Check Your Fixture and DMX Connection
Make sure your moving head is powered on, connected to the controller with a DMX cable, and receiving a DMX signal. Its DMX address and channel mode also need to match the fixture profile you’re using, because the joystick can only move a fixture that is set up to receive Pan and Tilt.
If this is your first time with the joystick, it’s easier to start with a single moving head. Once it works as expected, you can add more fixtures and try coordinated movement.
What Does the X/Y Joystick Control?
The X/Y joystick provides a more direct way to position a moving-head fixture during programming.
Instead of adjusting movement values manually, you can use the physical joystick to change the fixture's position.
For the setup covered in this tutorial:
|
Control |
Assignment |
|---|---|
| P1 | X-axis |
| P3 | Y-axis |
Once P1 and P3 are selected, the X/Y joystick can be used to control the movement of the selected fixture.
The joystick is primarily useful for positioning. Other fixture functions—such as color, dimmer, gobo, zoom, focus, prism, or strobe—still depend on their corresponding DMX channels and the fixture's selected mode.
Follow Along: Set Up and Use the X/Y Joystick
Right now the X/Y joystick can’t control the light, so we’ll assign it first. Do each step on your own controller as you watch the video.

Assign the joystick
- Press the Program button.
- Press the X/Y Axis Setup button.
- Select P1 and P3. P1 is the X-axis joystick button, and P3 is the Y-axis joystick button.
- Check the screen. When it shows the display from the video, the setup is done.
- Press the Exit Program button.
Use the joystick
- Press the Program button again.
- Choose a program position.
- Select your light.
- Push the joystick. Up, down, left, and right now all control the light.
Common Problems and What to Check
If the X/Y joystick doesn't move your fixture after you've completed the setup, don't change several settings at once. Start with the problem you can see, then check the related setting.
1. The fixture responds, but Pan and Tilt don't move
If the fixture responds to other functions, such as Dimmer or Color, but the head doesn't move, the DMX connection is probably working. Check the fixture's channel mode and make sure Pan and Tilt are available in that mode. Then go back to the X/Y Axis Setup and confirm that P1 and P3 were selected.
2. Two fixtures move when you only selected one
This usually means the two fixtures are receiving the same DMX commands. Check the DMX address of each fixture and make sure their channel ranges do not overlap unintentionally.
3. The fixture moves, but not in the direction you expect
This doesn't necessarily mean the X/Y setup is wrong. The way a moving head responds visually depends on how it is installed. A fixture facing toward the audience may appear to move differently from the same fixture facing toward the back of the stage, and one hung upside down on a truss will differ again. Before changing the controller settings, check the fixture's physical orientation and its Pan and Tilt settings.
4. The joystick worked before, but doesn't work now
First confirm that a fixture is still selected, since the joystick only moves the selected fixture. If you changed the fixture's DMX address or channel mode since it last worked, check that the fixture and the controller still agree with each other. If it's still unresponsive, repeat the X/Y Axis Setup. It only takes a few seconds and lets you confirm whether the joystick assignment is still correct.
A Simple Troubleshooting Order
If you're not sure where the problem is, check these in order:
1. Power → 2. DMX cable → 3. Fixture address → 4. Channel mode → 5. Fixture selection → 6. P1/P3 assignment → 7. Pan/Tilt response
Checking one item at a time makes it much easier to find the problem than changing several settings simultaneously.
Tips for Better Moving-Head Positioning
Think in targets, not in movement. Before you pick up the joystick, decide where each light should point: center stage, the singer, the drummer, the audience, or the back wall.
Check the picture from the audience. The view from behind the controller is rarely the view your audience has. Walk to where they’ll be, or at least look from the front, before you decide a position is right.
Position first, then add effects. Get Pan and Tilt right before touching color, dimmer, or anything else. It’s much easier to judge a position when nothing else is changing, and fixing it later means re-saving every scene that depended on it.
Check orientation early. Because mounting changes how the same joystick movement looks, test the joystick on each fixture before you start saving scenes. A fixture that moves the wrong way is quick to spot now and annoying to discover halfway through programming.
Don’t move everything all the time. A few well-chosen positions often look better than a beam that never stops. Constant motion works for high-energy moments, but stillness makes the movement that does happen count for more.
Organize your scenes consistently. Once you save many positions, use a consistent naming or numbering pattern, for example keeping static positions separate from movement effects, so you can find the right scene quickly during a show.
Frequently Asked Questions
What do P1 and P3 control on the DMX 240?
P1 is the X-axis joystick button, and P3 is the Y-axis joystick button.
Why isn’t my X/Y joystick moving the fixture?
Check that both P1 and P3 were selected in the X/Y Axis Setup, that the fixture you want to control is selected, and that it is receiving DMX with the correct address and a channel mode that includes Pan and Tilt.
What does the joystick control on a moving head?
The X-axis controls Pan, which turns the head left and right, while the Y-axis controls Tilt, which moves it up and down.
Why does my fixture move in the opposite direction?
The fixture’s mounting position and its Pan and Tilt settings affect how the same joystick movement looks. Check how it is installed before changing the joystick assignment.
Do I need two moving heads to use the joystick?
No. One fixture is enough to learn the basics. A second becomes useful when you want to practice coordinated movement.
Can I save positions I set with the joystick?
Yes. Once a fixture is where you want it, you can save that position as part of a lighting scene.
Wrapping Up
The basic workflow is:
Program → X/Y Axis Setup → P1 + P3 → Exit → Select Program Position → Select Fixture → Move the Joystick
Once you’ve mastered the basic movement, try adding a second fixture and experiment with synchronized and mirrored positions. From there, you can combine Pan and Tilt with color, dimmer, gobo, and other parameters to build more complete lighting scenes. For an example of saved positions working together, see Tutorial #5: How to Create an Overlapping Moving Head Chase Effect.
Continue exploring the Betopper DMX 240 Controller Tutorial Series for more practical DMX programming techniques and stage lighting tips.


Laisser un commentaire
Tous les commentaires sont modérés avant d'être publiés.
Ce site est protégé par hCaptcha, et la Politique de confidentialité et les Conditions de service de hCaptcha s’appliquent.