
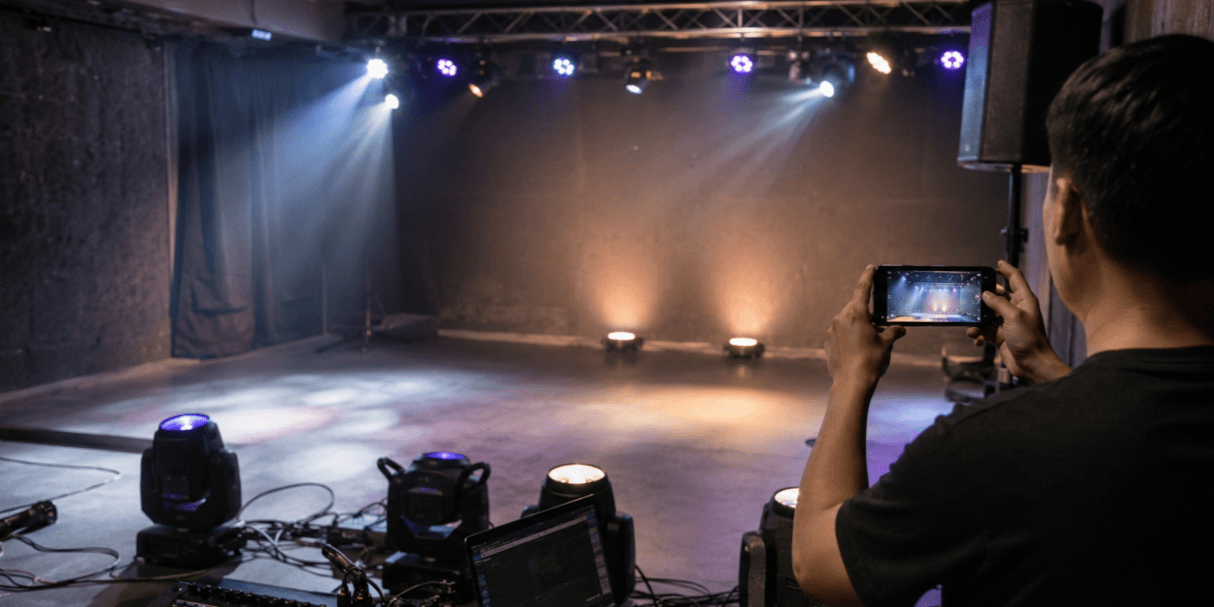
When a stage light does not respond as expected, a clear video can help technical support understand the issue much faster.
A useful support video is not just a close-up of the fixture. It should show what the fixture is doing, how it is connected, what mode it is in, and what control action is being used. With the right details, support teams can often tell whether the issue is related to settings, DMX control, cabling, fixture profile, power, or the fixture itself.
This guide explains how to record a practical stage light problem video for moving heads, PAR lights, wash lights, light bars, strobes, and other DMX-controlled fixtures.
1. Start With a Short Overview Shot
Begin the video with a simple overview of the full setup.
Before zooming in on the fixture, show where the light is placed and how it is connected. This helps support understand whether the problem happens with one fixture, several fixtures, or the whole DMX chain.
In the first 10–15 seconds, show:
- The fixture with the issue
- Other fixtures connected in the same setup
- The controller, console, or software if possible
- The DMX cable route
- The power connection
- Whether the fixture is mounted, placed on the floor, or being tested alone
This does not need to be cinematic. A steady phone video is enough. The goal is to show the real setup clearly.

2. Show the Fixture Model and Display Menu
Next, show the fixture itself.
If the model name is visible on the fixture or screen, record it briefly. If not, simply mention the model name while recording.
Then show the display menu. Support teams often need to see the current mode and settings before they can judge the issue correctly.
Try to show:
- Control mode, such as DMX, Auto, Sound Active, or Master/Slave
- DMX channel mode
- DMX start address
- Any error message on the display
- Pan/tilt reverse or dimmer settings if relevant
- Version or system information if available
Keep the camera close enough so the display can be seen, but do not move too quickly. If the display is hard to read on camera, say the setting out loud while recording.
For example:
“This fixture is set to DMX mode, 16-channel mode, address 001.”
That one sentence can save several rounds of follow-up questions.
3. Show the Controller or Software Action
If the issue happens during DMX control, the video should show the control action.
A common problem with support videos is that they only show the fixture reacting incorrectly, but not what the controller is sending. Without seeing the controller action, it is harder to know whether the fixture is receiving the wrong command or behaving incorrectly.
Record the controller, software, or app while you trigger the function.
Show actions such as:
- Opening the dimmer
- Changing color
- Moving pan or tilt
- Activating strobe
- Selecting a gobo
- Triggering a cue
- Pressing blackout
- Running a saved scene
If you are using software, show the fixture profile or patched fixture if possible. If the controller profile does not match the fixture’s selected DMX mode, the fixture may respond to the wrong functions even when the light itself is working.
4. Record the Issue Happening in Real Time
After showing the setup and control action, record the actual issue clearly.
Do not stop the video too early. Let the problem happen in real time so support can see the behavior from start to finish.
For example:
- If the light flickers, record when the flicker starts.
- If the moving head does not reset correctly, record the full reset process.
- If one color is missing, show the color test.
- If the fixture moves incorrectly, show the controller command and the movement response.
- If the issue happens only after warming up, record the moment it begins.
Avoid cutting the video into very short clips unless necessary. One continuous clip is often easier to understand than five separate short clips with no context.
5. Compare With a Normal Fixture If Possible
If you have more than one fixture of the same model, record a comparison.
This is one of the most useful ways to help support understand the issue. A comparison video can show whether one fixture behaves differently under the same settings.
A good comparison should show both fixtures using:
- The same DMX mode
- The same or clearly separated address setup
- The same controller profile
- The same cue or manual control
- The same cable chain, if possible
For example, if one moving head pans correctly and another moves in the wrong direction, show both fixtures responding to the same pan command.
If one PAR light shows red correctly and another does not, show the same red channel test on both units.
This helps support decide whether the difference is caused by fixture settings, controller setup, cabling, calibration, or a possible unit issue.
6. Show the Cable and Power Connections
Do not forget the connections.
Many stage lighting issues are related to cable routing, loose connectors, wrong DMX order, or power conditions. A short shot of the connection area can be very helpful.
Show:
- DMX input and output
- Power input
- Cable direction in the chain
- Any adapter being used
- Wireless DMX receiver or transmitter if used
- Power strip or power link if relevant
You do not need to unplug everything on camera. Just show how the fixture is connected.
If the issue only happens when the fixture is part of a full chain, show the fixtures before and after it in the DMX line. This helps support understand whether the issue may be signal-chain related.
7. Keep the Video Short, Clear, and Complete
A useful support video does not need to be long. In most cases, one clear video of 60–90 seconds is better than a five-minute shaky recording.
A good structure is:
- Show the full setup
- Show the fixture display and DMX mode
- Show the controller action
- Show the issue happening
- Show comparison or cable connection if relevant
Try to record in a bright enough environment so the display, cables, and fixture movement are visible. If the stage is too dark, use a work light or phone light briefly when showing the menu and connections.
Also avoid recording only from far away. A wide shot is useful at the beginning, but support still needs close shots of the display, fixture behavior, and controller action.
8. What to Send With the Video
When sending the video to support, include a short written note. The note should give the technical team enough context without making them guess.
Include:
- Order number
- Fixture model
- Number of fixtures affected
- DMX mode and start address
- Controller or software model
- Fixture profile used, if applicable
- Whether the issue happens in Auto mode, DMX mode, or both
- Whether you tested another cable or address
- Whether the issue follows the fixture after swapping position
A short message like this is very helpful:
“Two fixtures are connected to the same controller. Both are in 16CH mode. Fixture 1 works normally, but Fixture 2 does not respond to the color channel. I tested another DMX cable and changed the address, but the issue follows Fixture 2. Video attached.”
This kind of information helps support respond faster and more accurately.
Final Advice
A good support video helps technical teams see the full picture.
Instead of recording only the fixture, show the setup, menu, DMX mode, controller action, cable connection, and the issue happening in real time. If possible, compare the problem fixture with a normal fixture under the same settings.
Clear video evidence can reduce repeated questions, speed up troubleshooting, and help support identify whether the issue is related to settings, controller profile, cabling, or the fixture itself.
For stage lighting fixtures, setup guidance, and technical support, visit Betopper’s official website:
https://betopperdj.com/

Laisser un commentaire
Tous les commentaires sont modérés avant d'être publiés.
Ce site est protégé par hCaptcha, et la Politique de confidentialité et les Conditions de service de hCaptcha s’appliquent.