Complete Betopper LS10 moving head guide: fast setup, Auto & Sound modes, DMX basics, effect tweaks, and fixes—everything beginners need to start.
Betopper LS10 Overview: Features and What to Expect
The Betopper LS10 is a compact 10W LED moving head light designed for DJs, house parties, small stages, bars, and churches. Don’t be fooled by its small size—this fixture packs a punch with dynamic effects and professional features.
- Vivid Effects: Equipped with 8 colors plus white and 8 GOBO patterns (including rotation options), the LS10 delivers versatile looks that bring depth and variety to your show.
- Flexible Movement: Enjoy a wide 540° pan and 270° tilt range with a sharp 15° beam angle, allowing you to focus light precisely and cover different areas of your stage or dance floor.
- Multiple Control Options: Choose from Auto mode, Sound-activated mode, DMX512 (9/11 channels), or Master-Slave linking—perfect for both beginners and advanced users.
- Easy Installation: Lightweight and portable, the LS10 can sit directly on the floor with rubber feet or be mounted using the included bracket. An internal cooling fan ensures stable performance and reliable operation during long events.

Control Panel and Settings Explained
The LS10 has a small LCD display with four buttons: MENU, UP, DOWN, ENTER. Here’s how to use them:
- Addr → Set the DMX starting address (A001–A512).
- CHnd → Choose channel mode: 9CH (basic) or 11CH (advanced).
- SLnd → Select Master or Slave when running multiple units.
- SHnd → Run built-in shows (SH0–SH3).
- Sound → Turn sound-activated mode on/off.
- SEnS → Adjust microphone sensitivity (0–100).
- bLnd → Choose what happens if DMX signal is lost: blackout, hold last state, sound mode, or auto mode.
💡 Tip: Beginners can simply use Auto or Sound mode. For advanced users, DMX control unlocks full effects.
Control Channels and DMX Configuration
When using a DMX controller, you can select 9-channel (basic) or 11-channel (advanced) mode.
- 9CH Mode – Basic control: pan, tilt, color, GOBO, strobe, dimmer.
- 11CH Mode – Adds extra functions like independent prism control or fine movement adjustments.
Each DMX value (0–255) corresponds to different effects. For example:
- Color Wheel: 0–15 = white, 16–31 = red, 32–47 = blue …
- GOBO Wheel: 0–15 = open, 16–31 = star, 32–47 = circle …
- Strobe: low values = slow flash, high values = fast strobe.
👉 Check the user manual for the full DMX channel table. Once you understand the mapping, you can program custom light shows.
Operating Modes Explained
Auto Mode (Plug & Play)
- Go to MENU → Auto.
- The light runs through pre-programmed shows automatically.
✅ Best for quick setups when you just want effects with no extra equipment.
Sound-Activated Mode (Party Ready)
- Go to MENU → Sound → ON.
- Adjust sensitivity under SEnS.
- The built-in microphone will react to music beats.
✅ Perfect for DJs or home parties—lights move in sync with the music.
Master-Slave Mode (Multiple Lights in Sync)
- Connect two or more LS10s with DMX cables.
- On the first unit: set SLnd = Master.
- On the others: set SLnd = Slave.
✅ All lights will mirror the Master, creating a coordinated light show.
DMX Control (For Advanced Users)
- Connect the LS10 to a DMX controller with a 3-pin DMX cable.
- Set the fixture’s DMX address under Addr (e.g., A001).
Use the controller to adjust:
- Pan/Tilt → Move the head left/right/up/down
- Color Wheel → Switch between 8 colors + white
- GOBO Wheel → Select different patterns
- Strobe → Adjust flash speed
- Dimmer → Smooth fade in/out
👉 In 9CH mode, you’ll get basic control. In 11CH mode, you’ll unlock extra functions for more creative effects.
Installation and Setup – Step by Step
Step 1 – Decide where to place the LS10
- For beginners, simply place it on the floor or a table using the rubber feet.
- If you want a professional setup, mount it on a lighting stand or truss using the included bracket.
👉 Tip: Always keep at least 1.5m away from flammable materials and 0.5m from walls to avoid overheating.
Step 2 – Connect the power
- Plug the power cable into the light, then into a grounded outlet.
- The LS10 will start in its default demo mode.
👉 Tip: If the screen is upside down (when hanging), go to the menu and flip the display orientation.
Step 3 – Choose your control method
- Auto Mode: Press MENU → find “Auto” → confirm with ENTER. The light will run pre-programmed patterns automatically.
- Sound Mode: Press MENU → find “Sound” → ENTER. Adjust sensitivity with “SEnS” to match music volume. Perfect for parties.
- Master-Slave: Connect two or more LS10s with DMX cables. On one unit, set SLnd = Master. On others, set SLnd = Slave. Now all lights follow the master’s program.
- DMX Mode: Connect to a DMX controller. Set the address: MENU → Addr → e.g. A001. Each unit should have a different start address.
Step 4 – Test Basic Effects
Now that your LS10 is powered on, let’s try some simple effects.
1.Change Colors
- On the control panel, press MENU until you see Color (or use your DMX controller if connected).
- Press UP/DOWN to switch between different colors (red, green, blue, yellow, purple, etc.).
👉 You will see the beam of light change to the color you selected.
2.Change Patterns (GOBOs)
- Press MENU until you see GOBO.
- Use UP/DOWN to scroll through the 8 different patterns (star, circle, spiral, etc.).
👉 The light will project different shapes onto the wall or floor.
3.Try the Strobe Effect
- Go to Strobe in the menu.
- Use UP/DOWN to adjust the speed.
👉 At low speed the light flashes slowly, at high speed it flashes rapidly like in a club.
Pro Setup with DMX Controller
If you want full control of your Betopper LS10, you’ll need a DMX controller and a DMX cable (3-pin). Here’s exactly how to set it up:
Step 1 – Connect the light to the controller
- Take one end of the DMX cable and plug it into the DMX OUT port on your controller.
- Plug the other end into the DMX IN port on the LS10.
👉 If you have more lights, daisy-chain them by connecting DMX OUT of the first light to DMX IN of the next.
Step 2 – Set the DMX address
- On the LS10 panel, press MENU → Addr.
- Use UP/DOWN to choose a starting address (for example: A001).
👉 This tells the controller “which light is which.” If you connect a second LS10, give it a different address (for example: A013).
Step 3 – Choose channel mode
- Go to MENU → CHnd.
- Select 9CH (basic control) or 11CH (advanced).
👉 For beginners, 9CH is enough. Advanced users can try 11CH to unlock more features.
Step 4 – Control the effects from your controller
Move the faders on your controller to change effects:
- Pan/Tilt fader → moves the head left/right, up/down.
- Color fader → switches between 8 different colors.
- GOBO fader → changes the shape of the beam (star, circle, etc.).
- Strobe fader → controls flashing speed.
- Dimmer fader → adjusts brightness (0% = dark, 100% = full power).
Troubleshooting – Common Issues with the Betopper LS10
Even with correct setup, you may sometimes run into problems. Here are the most common issues and how to fix them:
1. The light won’t turn on
- Check power connection: Make sure the power cable is firmly connected to both the LS10 and the outlet.
- Try another outlet: Test with a different socket to rule out power issues.
- Inspect the fuse: If the light still doesn’t power on, check the fuse in the back panel and replace it if blown.
2. No DMX response
- Check DMX cables: Make sure you are using proper 3-pin DMX cables, not microphone cables.
- Confirm DMX address: On the panel, go to Addr and make sure each fixture has the correct start address (e.g., A001 for the first, A013 for the second).
- Controller check: Test with another fixture or cable to confirm the DMX controller is sending a signal.
- Terminator: If you have a long DMX chain, use a terminator at the last fixture to prevent signal problems.
3. The light turns on but doesn’t move
- Check operating mode: If you’re in Auto Mode, it should move automatically. If in Sound Mode, it only moves when music is playing.
- Verify DMX channel: In DMX mode, make sure the correct pan/tilt channels are being controlled.
- Reset the unit: Go to the menu and perform a factory reset to clear any incorrect settings.
4. Patterns or colors don’t change
- Confirm mode: In DMX, make sure you’re adjusting the correct channel (color or GOBO).
- Manual test: Use the panel to change color or GOBO directly—if this works, the issue is with the controller.
- Channel mode: Check if you’re in 9CH or 11CH; some features are only available in 11CH mode.
5. Light reacts poorly in Sound Mode
- Adjust sensitivity: Go to SEnS and increase or decrease sensitivity until it reacts properly to music volume.
- Music source: Place the fixture closer to speakers so the built-in mic can “hear” the beat more clearly.
6. Overheating or shutting down
- Ventilation: Ensure the cooling vents are not blocked and the fixture has airflow.
- Environment: Do not use in rooms hotter than 40°C.
- Continuous use: The LS10 can run for hours, but if overheating persists, let it rest for 10–15 minutes.
Safety Guidelines for the Betopper LS10
Using stage lights is exciting, but it’s important to follow safety rules to protect both the equipment and the people around it. Here are some key safety tips for the LS10:
1. Power and Electrical Safety
- Always use a grounded power outlet to avoid electrical shock.
- Never handle the power cable with wet hands.
- Do not overload extension cords or power strips—each LS10 draws little power, but multiple fixtures on one line can add up.
- If the power cable gets damaged, replace it immediately.
2. Heat and Ventilation
- The LS10 has built-in cooling, but it still generates heat.
- Keep at least 1.5 meters of clearance from walls, curtains, or other flammable materials.
- Do not block the cooling vents.
- Avoid using the fixture in rooms hotter than 40°C (104°F).
3. Mounting and Installation
- When hanging the LS10 from a truss or stand, always use the included bracket and a safety cable.
- Make sure the structure (truss, stand, ceiling) can support at least 10× the weight of the light.
- Double-check all clamps and screws before powering on.
- If placed on the floor, ensure the surface is stable and the fixture won’t tip over.
4. Usage Precautions
- Never stare directly into the light beam—it’s very bright and can harm your eyes.
- Keep children and pets away from the light during operation.
- Only use the LS10 indoors, away from rain, fog machines that spray liquid, or dusty environments.
- If you notice cracks on the lens or unusual sounds inside the fixture, stop using it until repaired.
5. Cleaning and Maintenance
- Clean the outer lens every 20 days to maintain brightness.
- Clean the inner lens and reflector every 30 days if you use the light often.
- Use a soft cloth and professional lens cleaner—never use alcohol or harsh chemicals.
- Check screws and DMX/power connections regularly to make sure nothing is loose.
Downloadable Resources
💡 Betopper LS10 10W 8 Gobo Mini Moving Head Spotlight
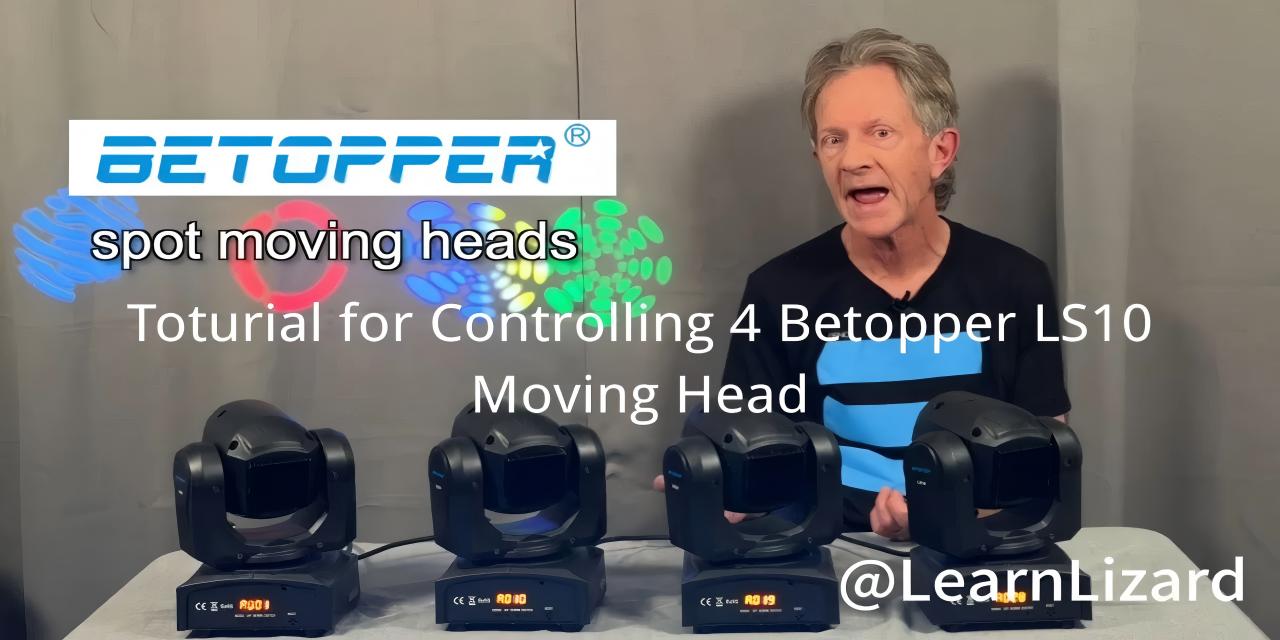
📹 Toturial for Controlling 4 Betopper LS10 Moving Head
💡 Explore More Betopper Lighting Solutions:
Shop at the Official https://betopperdj.com for moving heads, wash lights, strobes, and more—engineered for professionals and ready for your next event.


Laisser un commentaire
Tous les commentaires sont modérés avant d'être publiés.
Ce site est protégé par hCaptcha, et la Politique de confidentialité et les Conditions de service de hCaptcha s’appliquent.